


 9 / 24

AUTUMN/WINTER 2016 ISSUE
EQUINE MATTERS
8
TOP T I PS
Wound Care:
Things to do
Wounds on the lower limbs of horses can be
especially difficult to manage because of
poor circulation, joint movement and minimal
soft tissue between skin and bone. There is
also a risk of contamination from the
environment and, once a decision has been
made on who will manage the wound,
treatment can begin.
1. Wound Cleaning.
The initial goal when preparing a wound for
primary treatment is to decrease the threat of
infection by cleaning the wound. If possible,
hair near the wound edges should be
removed prior to cleaning. A water soluble
sterile gel should be applied to the wound to
keep hair and debris from contaminating the
site.
2. Debridement.
Often wounds are not discovered for a few
hours and portions of traumatised
tissue may start to die. Devitalised and
necrotic tissue may have to be surgically
removed in order to facilitate healing.
Honey dressings are often used to aid
debridement.
3. Bandaging types and
techniques.
These play a critical role in managing
wounds. Creating a moist wound healing
environment is paramount to promote
wound healing. Many wound issues can
be resolved through a good bandaging
technique.
4. The aim.
The bandage protects the wound from
contamination, provides a moist wound
healing environment, reduces swelling
and bleeding, and also stabilises or
immobilises the area.
Wound care:
Things not to do
When dealing with wounds lots of people
have their own ideas, thoughts, lotions,
potions and powders to help get wounds to
heal. Many recipes have been handed down
over the years and lots of commercial
products are now available from tack and
feed suppliers. Some claim to have amazing
healing properties. The fact is, most wounds
will heal anyway, regardless of what we put
on them, as long as they are not being
delayed by certain factors
(figures five, six
and seven)
.
1.
When cleaning a wound, using dilute
chlorhexidine (HiBiScrub, Molnlycke Health
Care) within the first six hours prevents
bacteria from multiplying and can buy you
and the vet some time if the wound needs
stitching. However, bathing a granulating
(healing) wound with chlorhexidine can
delay the healing process as it will inhibit the
collagen matrix as the wound tries to close
itself from the edges. Plain water or a salt
solution is better.
2.
Don’t be tempted to apply blue spray,
wound powder or any other wound
preparations, as the vet will just have to
wash them all off again to examine it.
Vaseline should also be avoided.
Anything that is oil based will delay
healing as it inhibits fibroblast (immature cell)
migration across the wound. Oil based
preparations should only be used on intact
skin for scars. If in doubt, just wash with
clean water or use a hosepipe with gentle
pressure, apply a sterile (if possible) dressing
and call your vet.
5. Reinforcement:
Apply a layer of duct tape to the toe of a
foot dressing. This will help keep the
bandage clean and dry, and should
prevent the bandage from wearing away
in the toe area.
6. Prepare:
Ensure all bandage materials are ready
before you start. This means swift
application and maintaining cleanliness.
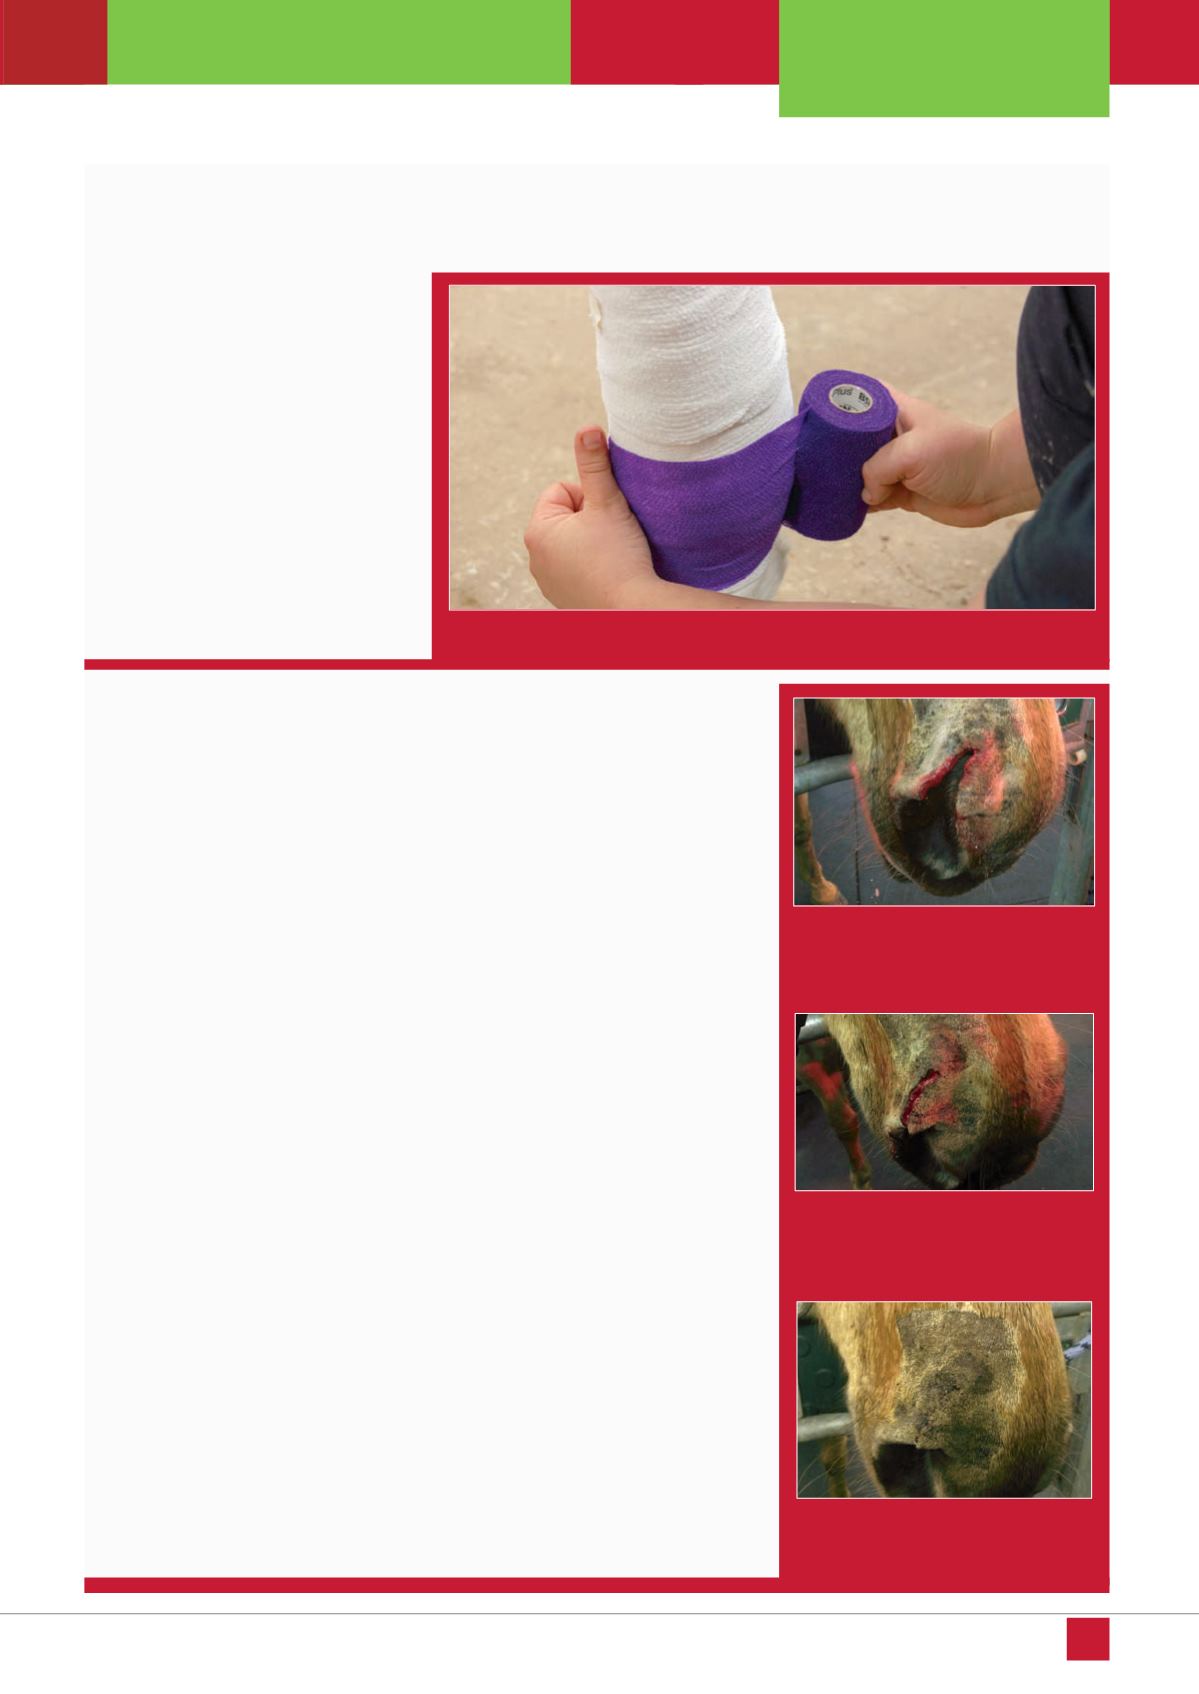
7. Bandage up:
It is important to start at the bottom of the
leg and work your way upwards, as this
will reduce the risk of the bandage
slipping
(figure four)
.
8. Clockwise or anti-clockwise?
Apply the bandage starting at the front of
the limb and work towards the back. Be
aware this changes depending on the
way you hold the bandage and on the
limb!
9. Check:
Make sure your bandage isn’t too tight.
You should be able to easily fit a finger
down the side.
10. Practice makes perfect:
Don't forget to practice before you need
to bandage in an emergency as it feels a
bit cumbersome to start with!
Figure four. Work your way upwards to reduce the risk of the bandage slipping
Figure five. Wounds can occur
anywhere on the body. This nostril
wound would not heal neatly without
stitches due to its exposed location.
Figure six. Mid repair. The nostril has
had an internal layer of absorbable
sutures placed to make the repair more
robust and resilient during healing.
Figure seven. After repair. The ends
of the stitches are buried to create
less irritation during healing